Sneaky Compound Bow Shooting Tips for Beginners

Two of the most important compound bow shooting tips for beginners that I can offer you are… a positive approach, focus, determination and most importantly, the right mindset.

Compound BowMaster these and you will be way ahead of the pack for sure.

You will more than likely require some assistance from someone who is significantly better at it than you.

Archery safety is a very important aspect so you best brush up on it prior to seeking assistance.

I’ll share this good piece of advice with you because it’s important and it’s a question I get asked on a regular basis

How often should you wax your bow string?

Every 2 or 3 weeks will do it.

The bow string is quite possibly the most important component of your bow so it’s critical that it’s kept in good order. One of the best options for maintaining it is to get hold of some good quality bow string wax which can be obtained from an archery outlet.

Scrape off a small blob onto your finger and rub it along the string until there’s nothing left, this will help keep your string in top condition, doing this on a regular basis will ensure is stays that way.

Get Yourself a Good Bow Sling

One one common thing that shooters do is ‘torque’ the bow with the hand you hold the bow with. 

bow slingThis situation comes about as a result of you not placing your hand correctly on the grip.

The force of you drawing your bow rotates it slightly and after it’s fired, it tends to spring back to your hand position.

So, if you’re right hand dominant and use your left hand to grasp your bow and your right hand to release the arrow, you will torque the bow to the left or to the right.

This is why fitting a sling to your bow is a smart idea. A sling attached to the stabilizer will also ensure that you’ll never have to worry about dropping your bow and possibly damaging it.

Many archers concern themselves with dropping their bow after shooting and after they release.

A bow sling stablizes your bow and holds it so there’s way less chance of losing it.

Whilst doing this it also protects other components such as cams, cables and strings and generally keeps your bow in great condition.

Try Not to Jerk the Trigger When Shooting

When you start your archer career there’s one thing you can count on doing that will annoy you… jerking the trigger.

Just about everyone has this problem to begin with and it results in you becoming frustrated with your efforts.

What you could do is use a trigger release.

A trigger release is a worthwhile archery accessory. It’s a mechanical device that assists you firing your arrows more precisely, on a constant basis. This device holds your bow string (rather than your fingers) until you’re ready to shoot then, with the press of a button, it releases the bowstring.

The greatest benefit this device provides is that it requires very little pressure to fire, so there’s very little or no jerking.

Trigger releases are really a common site among most archers.

Raise the Anchor!

archery anchor pointNo… we’re not referring to pulling the anchor and changing fishing spots.

When you draw your hand back to shoot, the part of your face that your hand touches is referred to as your anchor point.

It’s not a specific spot on your face, it’s simply where you hand happens to touch and that position is comfortable for you.

Everyone’s anchor point is different.

When you have established an anchor point that gives you the best results, make sure you  use this same point every single time you shoot. Training is simply practice, practice, practice.

To locate your favored anchor point, you need to assume your stance, then nock your arrow and start drawing back. Read more about your stance following.

Correct Archery Stance

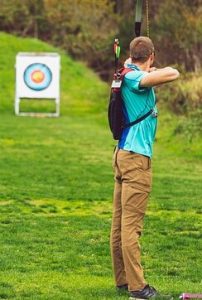
A correct stance is paramount if you wish to get to the point where you’re shooting accurately on a consist basis.

archery stanceA large portion of beginners ignore this rule and still expect to become a skilled archer… BIG mistake.

Anybody can pick up a bow and fire an arrow but they’ll not be a successful archer until they get the basics right. A correct stance is a critical factor in achieving greatness. It’s the building block of archery and simply cannot be ignored.

A good way to understand the best shooting position is to kick off with a bow.

Lay a stick on the ground to mark your shooting position then picture in your mind a line from the center of your target to where you’re standing.

This imaginary line is referred to as a target line and it will help you in learning your stance.

Your two key options are ~

  • The square stance
  • The open stance

Square Stance

This entails placing your feet either side of your imagery shooting line. Next, adjust the space between your feet to shoulder-width/hip-width. 

This is a comfortable and more stable way to stand I think you’ll agree.

Check to see that your feet are parallel with the target line and at right angles (or square) to the target, hence the name Square Stance.

Open Stance

At first, this option looks like a square stance only you move your back foot forward until the ball of your foot evenly straddles the target line. Next, move your front foot back to around 2” behind the target line. 

Your front foot should now be behind your back foot. Turn slightly towards the target about 20 degrees and your feet and hips slightly open to the target with your shoulders facing forward.

This stance results in your waist being more open and aligns your shoulders with the target, giving you extra balance and control for shooting.

Improving Your Aim

This activity is dependant on a number of individual activities, namely ~

  • Holding your compound bow correctly
  • Nocking the arrow by pushing the slit in the end of the arrow over the string
  • Drawing the bow
  • Locating your anchor point. 

It means that you’re ready to take your first shot at your target.

Taking aim appears to be a straight forward and simple task, but not so.

One activity you may not be aware of is when you are taking aim you need to transfer weight to your back muscles.

After anchoring you need to move the power held in your arms to you back muscles. In order to achieve this you need to move your triceps (your draw arm muscles) which run along the back of your arm, and your scapula back towards the spine.

It’s kind of like drawing a circle with one of your shoulders. You’ll find that you’ll be able to hold your bow without shaking.

As you get better at mastering this skill you’ll find that the elbow on your draw arm will now line up with your arrow and you will feel much more comfortable.

After you’re all lined up start you aiming procedure by looking at your target while watching the pin move around the middle. Bearing in mind that the pin will never be rock steady so don’t create further issues by trying to ‘freeze it’.

When you are ready to release the shot it’s important that the tension across your back muscles is retained to ensure your releases continue to be top notch.

Consistency is king in this regard.

Get Fitter & Stronger for Archery

There’s a ton of enjoyment to be had by involving yourself archery and your enjoyment will continue to grow as your skills improve. Routine training plays a big part in this as does your bodily strength.

Your strength can be improved by doing simple exercise such as running, squats, push ups, etc.

Having a healthier and stronger heart helps to reduce your heart rate which in turn results in you being able to hold steadier as you release.

A great exercise for the heart is doing laps at your local pool.

If you’re in reasonable proximity to a lake or river, or even the ocean, canoeing is a great exercise to improve muscle strength. If you’re not close to water then a rowing machine will do the trick.

Surfboard riding is also beneficial for overall body toning.

Lifting weights is good because this routine includes using your smaller auxiliary muscles and also works on your motor skills.

Working your auxiliary muscles will build on the fundamental requirements for archery, that is, good balance and a steady hand.

Following each practice session, drawing your bow a number of times is beneficial as it’s the same activity as shooting in a normal archery session

As in a normal shot, your arm should be straight out in front of you while drawing the string right up to the anchor. It’s best not to use your fingers to draw in this exercise, a release aid is a much better choice. Try and stay in this stance for as long as you are able to, the longer the better.

How Accurate is a Good Archer?

How accurate is a good archer is a bit of an odd question really, but archers are asking it.

The short answer is… accurate enough to achieve what you want to achieve!

There isn’t a single archer still breathing who isn’t attempting to improve his accuracy, everyone wants to be the top Kahoona. 

And from one retail promotion to the next, there’s always someone willing to sell the dream of making you a ‘better archer’. 

Far be it from me to say they’re all gimmicks, because some are not. It’s more likely the case that inaccuracy is a result of not enough practice causing inconsistent form. 

What I’ll do here is give you some tips on how to enhance your form and, as a result, your accuracy.

1. The All Important Anchor Point  

This is the most significant of all steps because it can greatly enhance your accuracy. When drawing a bow back to full draw, you’ll be needing to select two anchor points: 

When drawing a bow back to full draw, you’ll be needing to select two anchor points:  

  • First one is where the string should be anchored.
  • Second one is where your hand can be anchored.

Every time you draw your bow, your anchor points should not vary. If you follow this strategy you will ensure that each shot is identical, so boosting your accuracy and reliability.

2.  Your Standing Position  

Although some may find it difficult to understand, the position which you stand has a significant impact on accuracy. You should stand so that the side of your body is closest the target and your feet need to be a little less distance apart than the width of your shoulders.

This permits the most stretch and enables you to reach your full draw capacity, allowing you to get the most speed out of your bow.

3. The Grip

The correct grip on a bow is determined by two critical factors: 

  • The way your hand is clasps the handle.
  • Your strength.

Placing the middle of the handle in line with the middle of your wrist is the optimum way to hold your bow. Move the tips of your four fingers to the front. 

Hold the bow barely tight enough to retain it in your hand however, if you don’t grip it tight enough, the bow will shift left or right when you release your arrow resulting in you missing your target. 

Implementing these easy guidelines and putting in enough practise will definitely boost your technique and allow you to shoot consistently better.

Ahh, The Pleasure of Archery

family archery funThink about and understand the reasons you love archery.

If you do, you’ll be more motivated and you’ll reach your intentions quicker.

When you understand your motivation you can align your training regime with what motivates you and develop your own program for how and where you train.

At times you may not wish to train, you may just want to go out and shoot some arrows… and that’s OK!

Summary

There is not one individual who comes into the world as a skilled archer.

When practicing your archery it’s important that you remain focused and understand that you will definitely not get it right straight off the bat.

Focus on where you are going, not where you are and be confident that you WILL be a competent archer in the fullness of time.